
PhotoRec on Mac: how it works, and a simpler alternative
Updated 13 October 2026
PhotoRec is a free, open-source recovery tool from CGSecurity, and it runs on a Mac. It's genuinely good at finding photos, videos and documents on memory cards and drives. On a Mac, though, it runs in Terminal, needs administrator rights, and saves what it finds under generic names like f1234567.jpg. This guide explains how to use PhotoRec on a Mac, where people usually get stuck, and how Found Again compares if you'd rather use a regular Mac app.
Download Found Again freeWhat PhotoRec does well
- It knows a huge number of formats. CGSecurity lists more than 480 file extensions in about 300 file families.
- It works when the file system is gone. PhotoRec ignores the file system and reads the underlying data, so it can find files after a format or on a damaged card.
- It's read-only on the source. It reads the card or drive and writes recovered files somewhere else.
- It's free and runs almost everywhere, including Windows, Linux and macOS.
- It has a sibling, TestDisk, which can undelete files with their original names from FAT, exFAT and NTFS when the file system is intact.
How to run PhotoRec on a Mac
There are two ways to get it.
- Homebrew. If you use Homebrew, run
brew install testdisk. This installs PhotoRec and TestDisk, and Homebrew provides native Apple silicon builds. - The CGSecurity website. The current stable release, 7.2, is offered for Mac as an Intel build only. It runs on Apple silicon through Rosetta 2. Apple has said Rosetta will stop being available for general apps after macOS 27, so this route has a limited future on Apple silicon Macs.
Then, with your card in a card reader:
- Open Terminal and run
sudo photorec. Enter your Mac's password. (For the website build, go to the folder you extracted and runsudo ./photorecinstead.) - Choose the disk with the arrow keys. Pick it by size, and double-check it's the card, not your Mac's drive.
- Choose the partition, then open File Opt if you want to limit the search to certain file types, such as jpg and mov. This saves wading through thousands of unwanted files later.
- When asked for the file system type, choose Other for FAT, exFAT and NTFS.
- Choose whether to search only the free space (where deleted files are) or the whole partition. After a format, choose the whole partition.
- Choose a destination folder on your Mac, never on the card, and confirm it with the key shown on screen.
- Wait. PhotoRec saves files into folders called recup_dir.1, recup_dir.2 and so on as it goes.
Why people get stuck with PhotoRec on a Mac
Terminal and sudo
Everything happens in a text interface driven by arrow keys and Enter. It's well designed for what it is, but it's unfamiliar to many Mac users, and running anything with sudo feels risky if you haven't done it before.
Gatekeeper blocks the download
The website build isn't notarized by Apple, so macOS refuses to run it at first. Since macOS Sequoia, Control-clicking and choosing Open no longer gets around this. You have to try to run it, then go to System Settings › Privacy & Security, scroll down and click Open Anyway, then confirm with your password. Many people stop here.
macOS privacy prompts
Reading a memory card at a low level can trigger macOS privacy prompts for Terminal. If you've denied one before, PhotoRec may not see the card until you allow Terminal in System Settings › Privacy & Security.
Generic file names and flat folders
PhotoRec names most files by where it found them on the disk, so you get names like f1234567.jpg. Original names and folders are lost, except for some formats that store a name inside the file. The results land in numbered recup_dir folders with no grouping by date or camera.
No preview while it works
There's no gallery or thumbnails. You find out what it recovered by opening the recup_dir folders in Finder, which can hold thousands of files, many of them fragments or types you didn't want unless you used File Opt.
PhotoRec vs Found Again
| PhotoRec | Found Again | |
|---|---|---|
| Price | Free, open source | Free, no limits |
| How you use it | Terminal, keyboard menus | Mac app |
| Apple silicon | Native through Homebrew; website build is Intel only | Native on Apple silicon and Intel |
| Opens without warnings | Homebrew build, yes; website build needs Open Anyway | Yes, signed and notarized by Apple |
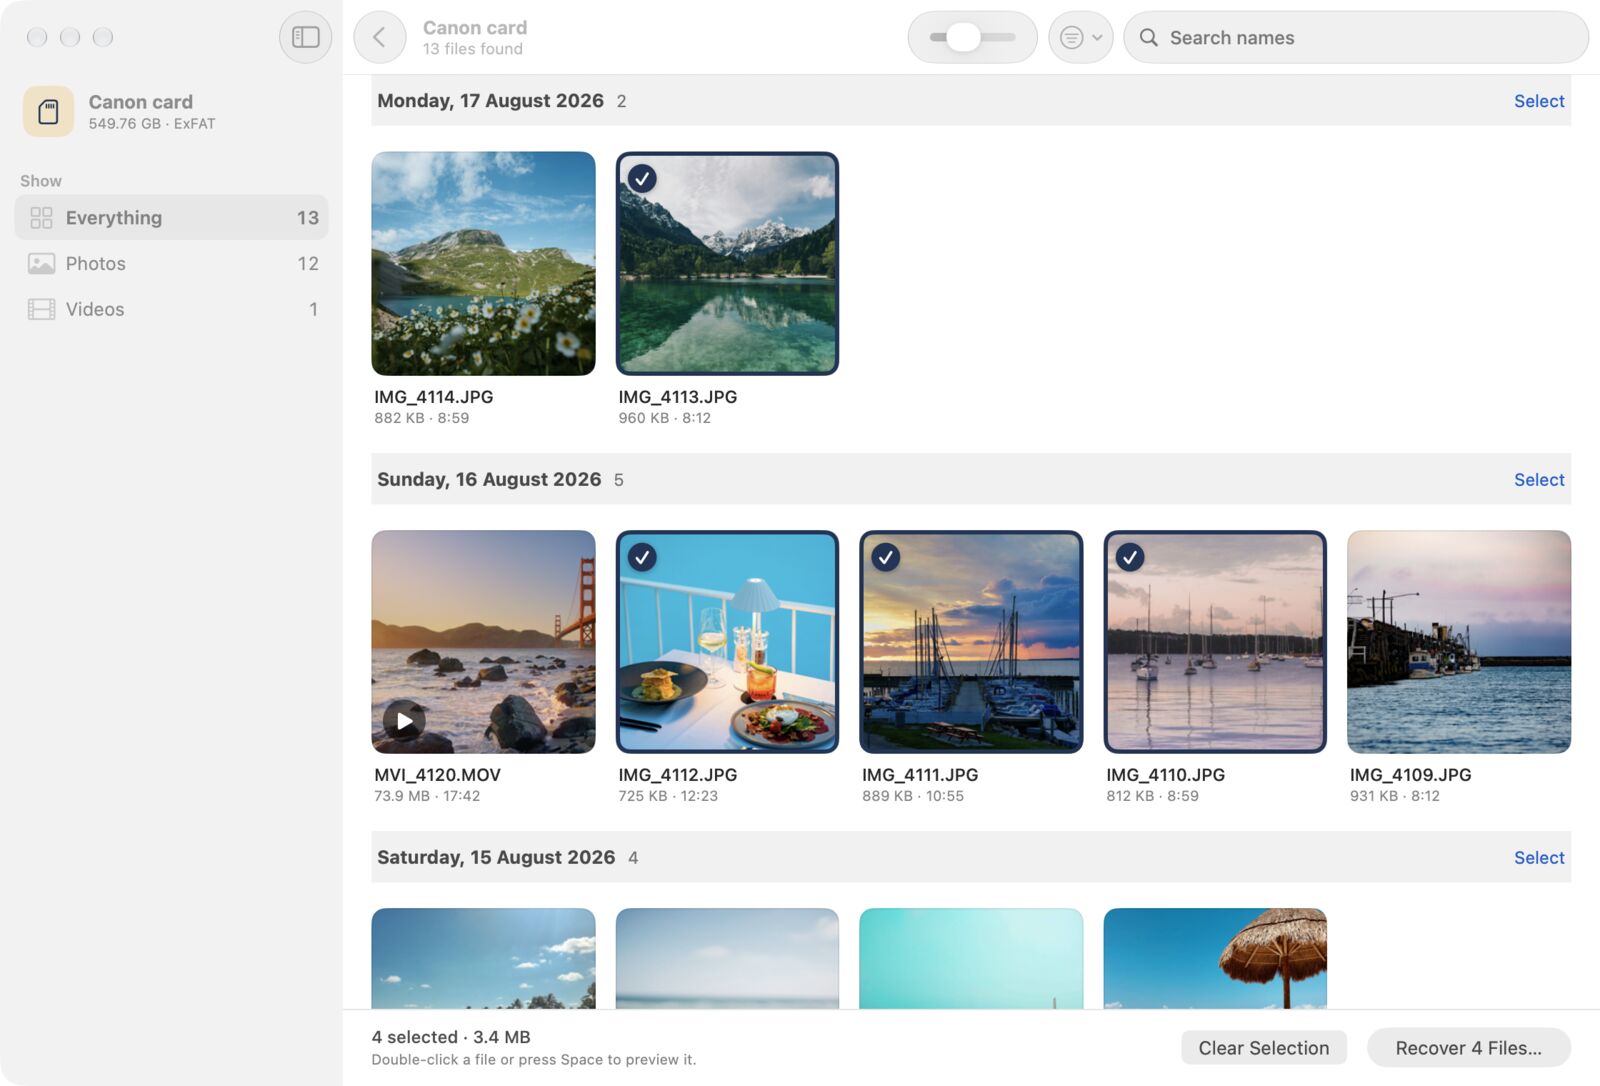
| Original names of deleted files | Only when the name is stored inside the file (TestDisk can undelete names separately) | Reads FAT32 and exFAT file records first, so deleted files usually keep their names, folders and dates |
| Files found by content | Named by position, like f1234567.jpg | Photos named by date taken, like 2024-06-01 14.30.00.jpg, with the camera model |
| Preview | None | Thumbnails, including video frames, grouped by day |
| Results while scanning | Files saved as found | Files listed as found; recover any time |
| File formats | 480+ extensions | Main photo, RAW, video, audio and document formats (see the list) |
| Damaged files | Option to keep corrupted files | Marks files Partial or Damaged before you recover |
| Runs on | Mac, Windows, Linux and more | Mac only (macOS 14 or later) |
When PhotoRec is the better choice
- You need a file type Found Again's deep scan doesn't recognize. PhotoRec's format list is far longer.
- You're on Windows or Linux, or recovering on a machine that isn't a Mac.
- You're comfortable in Terminal and want fine control, such as its paranoid and brute-force options.
For photos and videos from a camera card on a Mac, especially files that were just deleted, Found Again is usually quicker to use, and it brings files back with their names when the card's file records survive. Nothing stops you trying both. Both only read the card.
Questions
Is there a PhotoRec GUI for Mac?
Not officially. QPhotoRec, PhotoRec's graphical version, isn't offered in the Mac downloads, and Homebrew's testdisk package installs the command-line tools. CGSecurity's download page points people who want a graphical app to Disk Drill, which charges to recover files on Mac.
Does PhotoRec work on Apple silicon Macs?
Yes. Homebrew's build runs natively. The build on CGSecurity's website is for Intel and runs through Rosetta 2, which Apple has said will stop being available for general apps after macOS 27.
Why did PhotoRec give me thousands of .txt files?
PhotoRec recognizes many kinds of data, including fragments of text. Before you start, open File Opt and turn on only the types you want, such as jpg, cr3, mov and mp4.
How can I rename PhotoRec's files by date?
The free tool ExifTool can rename photos using the date they were taken. With Homebrew, run brew install exiftool, then, in the folder that holds the recup_dir folders, run exiftool '-FileName<DateTimeOriginal' -d '%Y-%m-%d %H.%M.%S%%-c.%%e' recup_dir.*. Files without a date keep their names. Try it on a copy first.
Is PhotoRec safe to use?
Yes. It's well established and only reads the source disk. Download it from cgsecurity.org or install it with Homebrew, and always save recovered files to a different disk from the one you're recovering.